-
Sale
 Select optionsQuick View
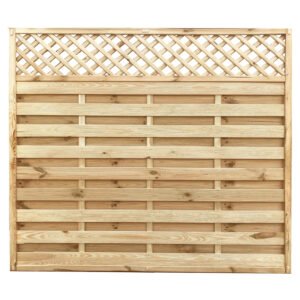
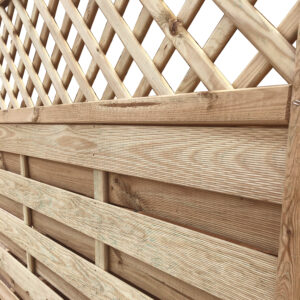
Horizontal Lattice Top
Decorative panel with trellis incorporated. Available in various heights.£35.00 – £52.00Select optionsQuick View -
Sale
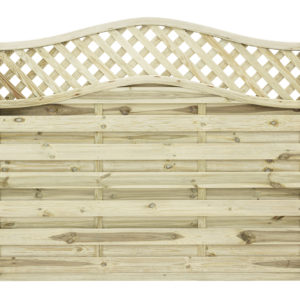 Select optionsQuick View
Elite St Meloir Fence Panel
Tanalised (Pressure Treated). 1.8m wide.£80.00£55.00Select optionsQuick View -
Sale
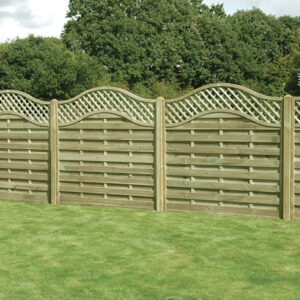
 Select optionsQuick View
Omega lattice Top Fence panels
Omega lattice top Fence Panels Height measurements are to the top of the bow/wave pressure treated and kiln dried. panels are 1.8m wide (metric)£46.00 – £64.00Select optionsQuick View -
 Add to basketQuick View
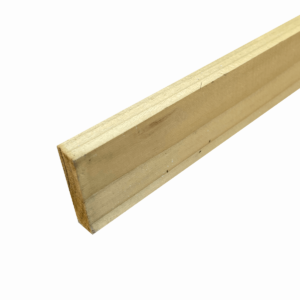
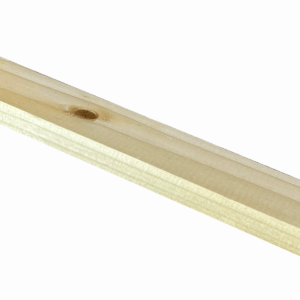
Lap and feather edge Panels Cut to Size
Panel cutting service for Lap panels£10.00Add to basketQuick View
Fence Panels
Oakdale Fencing stock a wide range of fence panels suitable for any fencing project. Our stock includes a variety of different styles to suit your preference. All our panels are available for delivery throughout the UK.
All the timber used in the construction of our fence panels is FSC marked. The FSC mark is a global certification scheme which confirms the timber has been sourced from well managed forests which are operated on a renewable basis. All of our fence panels are tanalised. Tanalised fence panels are treated with a chemical preservative compound. This treatment helps to prolong the life expectancy of the fence panel. Tantalised fencing panels are more durable and resilient to fungus and rot. The tantalising treatment carried out on our fence panels is environmentally friendly and safe for pets and animals. This treatment can increase the life expectancy of fencing panels to up to 25 years.Types of Fence Panels:
Feather Edge Fence PanelsIdentifiable by their vertical boards, featheredge fence panels are perfect for creating privacy and security. They offer strength and durability. Available in a variety of different heights these panels come in a standard 6ft width. Available in both full framed and open options.
Tongue and Groove Fence PanelsAvailable in standard and lattice top, tongue and groove fence panels are strong and sturdy. These panels are made from premium thick timber and have a traditional wooden panel effect. The lattice top option provides the opportunity to add crawler plants.
Overlap Fence Panels
Also known as waney edge or larch lap, overlap fence panels consist of horizontal trips of timber surrounded by a full frame. Overlap fence panels are a well priced basic fence panel.
Venetian Fence Panels
Venetian fence panels are a perfect fencing solutions for adding style to your garden. These panels are made up of horizontal strips of high quality planned timber. Offering privacy whilst also allowing light to pass through, these contemporary panels can be used as standard fencing or as a divider or boarder.Things to consider when choosing Fence Panels
Depending on the size of the area that you wish to fence, there are a wide range of options you may wish to consider when choosing the right fence panels for you. First and potentially most importantly, you need to consider the purpose of the fence. Are you looking at fencing panels as a means of creating a boundary line between yourself and a neighbour? In which case, you may be happy building a low fence using fencing panels such as our 3ft picket fence panels. These panels will create a boundary line without distorting any views across neighbouring land (ideal if your land looks out to a country view or fields. However if you are wanting to build a fence will the intention of introducing some privacy into your garden, it is likely that our range of 6ft fence panels would be more appropriate.
If you are looking for something more decorative then our horizontal lattice top fence panels with an incorporated trellis on top may be more appropriate.
The type of fencing panels you choose may also depend on your budget. Oakdale Fencing Ltd stock a variety of different priced fence panels to suit any budget. Our overlap traditional fence panels are available in a variety of size and will provide complete privacy.
Heights of Fence Panels
Our fencing panels come in a variety of different sizes to suit your fencing needs. Our fence panels range from 3ft to 6ft with a variety of different styles available. Below is a guide to fence panel heights and the amount of privacy they provide.
3ft Fence Panels
This is the smallest size that Oakdale Fencing Ltd stock. While it offers little in the form of privacy, it will create a definitive boarder and help segregate land and define clear boundaries. This is the cheapest fence panel that we provide.
4ft Fence Panels
This size panel will help you secure your garden and set a clear boarder line. Depending on your own height, these panels will be around chest height for many and still allow for visibility onto neighbouring land. These panel are also good for containing pets such as small dogs.
5ft Fence Panels
These panels will add a level of privacy and help secure your garden. This height of panel may be appropriate if you are looking to build a garden fence but would still like to just a bout see over the top. 5ft panels would also be appropriate for containing most larger dogs.
6ft Fence Panels
This height offers the best level of privacy and will also help deter potential intruders. It will likely contain ever type of dog and help secure your garden.
Fence Panel Installation Guide
Prior to carrying out your fencing installation it is important to ensure that you have chosen the correct type of fencing for your desired requirements. Oakdale Fencing provide a wide range of fence panels and concrete fence posts perfect for almost any fencing needs. If you would like any help regarding choosing the right fence panels please feel free to contact our friendly and knowledgeable customer service team.
Equipment needed:
Post digger, Spade, Postmix, Spirit Level, Tape Measure
Safety Wear: Gloves, Work Boots, Dust Mask, Goggles
Materials:
Postmix, Ballast/gravel, Fence Posts, Fence Panels, Post Caps (optional), Screws and Fixings.
Step 1:
Start by digging the hole for your fence post, the depth and diameter of your hole all depends of the size of your fence, the height and type of fence. Before purchasing your fence posts and panels, make sure your fence posts are 2 ft longer than your fence panels.
Step 2:
Before digging your fence post hole make sure the ground is clear, free of any old concrete or old fence posts that may still be in the ground. Then using your string line, mark out where you want your fence to go, make sure to get then exact measurements of your panels when laying the string line out and mark out where the fences post are going to be.
Step 3:
Dig a 2 ft hole where you want your fence posts to go using a posthole digger. Once the first post hole is dug out, use a length of timber that is the same length of your fence panel plus half the width of your post to mark out the center point of the next hole.
Step 4:
After digging your holes in accordance to your fence size and type, fill your post holes with 2 inches of ballast or gravel to allow drainage then level it out. Position the post in your hole on top of the 2 inches of ballast/concrete and make sure it is level.
Step 5:
Once the post is in place and level, fill the hole half way with water, then pour in the Postcrete evenly around the post until no water is visible and its nearly at soil level. We advise around 3 bags of Postcrete per post hole. Postcrete/Postmix is preferred instead of concrete as it significantly reduces drying time and it comes ready to use, with no mixing required. We recommend that you use a dust mask, gloves and goggles whilst using the Postcrete, safety first!
Step 6:
While the mix is still wet use your spirit level to check the post is still straight. The Postcrete will take between 5 to 10 minutes to set. When the Postcrete is set and the post is in place, finish off by covering the top of the hole with grass or soil.
Step 7:
When all your fence posts are in place and the Postmix is set, lay a length of timber across the top of use posts and use your spirit level to make sure all your fence posts are correct and the same height. When you have checked they are all level, have your fence panel at the ready.
Step 8:
Before putting your fence panels in place, fix your brackets and screw in to the panel. This will make it easy to fix the panel to post when holding the panel in the upright position. When you are sure the panel is in line with your post and level, fix panel to post. Fix until all panels are secure.
Step 9:
(Optional) To finish the job we recommend adding post caps. They look good and most importantly help prolong the life of the post. Simply nail in to the top of each post with a nail long enough to go through the cap and penetrate the post so it is fixed securely.

